
After 3 days of trying to figure it out, it turned out simpler than I originally thought. The documentation and other articles are very poor and don’t have examples. In this article, I’m using a domain illozoo.com as a real life example to show you how I did it.
The whole trick with CloudFlare caching S3 files is to trick it you’re serving your S3 files from your own domain or, at least, sub-domain. There is no setting or anything special to be done in Cloudflare after that. Once you setup your custom sub-domain, CloudFlare will automatically start cacheing your files because they are on the same domain. The tricky part is setting it up.
How to Setup:
- You must setup custom sub-domain for S3. (using CNAME in DNS)
- You must (re)name your S3 bucket “cdn.domain.com“.
- (For wordpress: Change your CDN plugin settings)
Instead of serving files from [bucket].s3.amazonaws.com you’ll be using cdn.domain.com
The good news is it’s easy and free to setup 🙂 . The bad news is you’ll need to rename your bucket if it already exists and there’s no rename bucket command in AWS (in 2019, hopefully they’ll add it in the future).
If you already created the bucket and it has content, you’ll need to create a new bucket and move the content to the new one 🙁
1. Setting up custom CDN sub-domain:
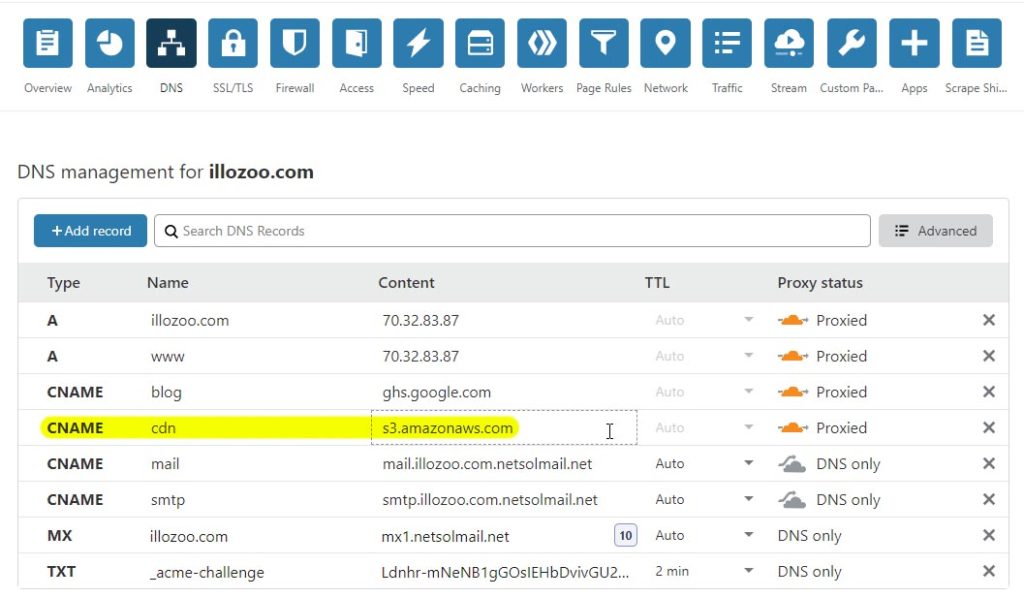
All you need to do to serve files from cdn.domain.com is add the following DNS record in Cloudflare.
Type: CNAME
Name: cdn
Content: s3.amazonaws.com
No, you do not need to add the bucket name in front of content. Originally, I thought it should be [bucket].[region].s3.amazonaws.com but it’s really not needed. It will still work but anything you add in front of .s3 will be omitted.
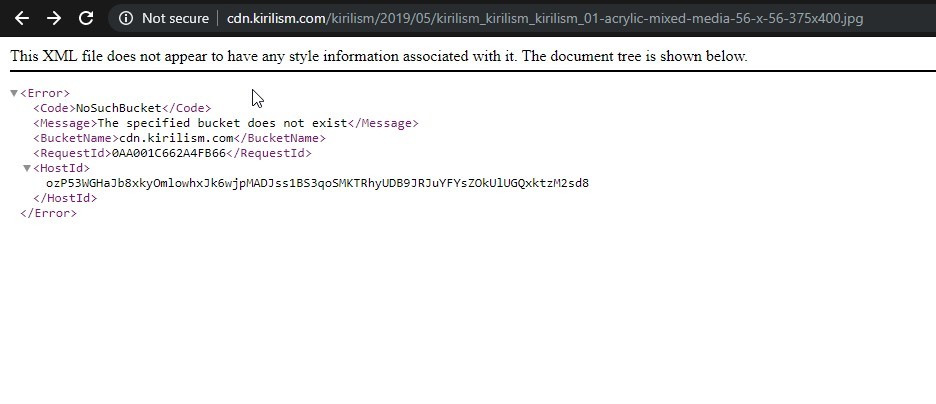
You can now test to see if the cname works by going to https://cdn.domain.com. If you haven’t yet created the bucket you’ll get NoSuchBucket. If you did create the bucket but it’s empty you’ll get AccessDenied.
2. Re-naming your bucket
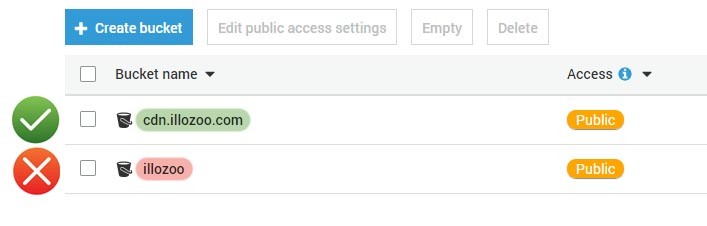
This is probably the most dissapointing part, since there is no easy way to rename a bucket. The bucket name must be cdn.domain.com.
If you’re starting fresh then there’s nothing to worry about. Just name your bucket that. However, if you’ve already made a bucket full of objects, then you’ll have to copy the content to a new one. Create a new empty bucket named cdn.domain.com. Then, you’ll need aws-cli to run the following command and copy all the contents to the new one. aws s3 sync s3://[old-bucket] s3://[new-bucket]
In my case, it was copying with around 9MB/s so on 15GB it will take about 30mins. Alternatively, you can use:aws s3 mv s3://[old-bucket] s3://[new-bucket] --recursive
This will move the files from one bucket to the other, instead of coping, so you won’t have to delete the old bucket. It will end up empty.
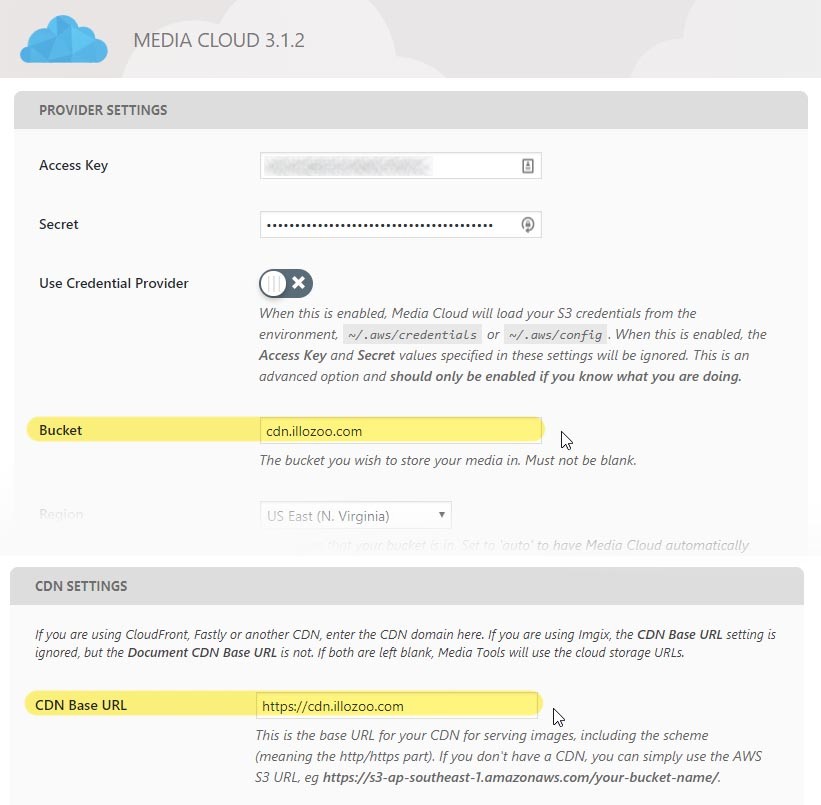
3. Change Plugin Settings
Finally, if you’re using WordPress don’t forget to change your CDN plugin settings. In my case, I’m using Media Cloud so I had to change the bucket name and add CDN Base URL.
Notes: Keep in mind that you don’t have to use “cdn” as your subdomain. It could be anything you like — “files”, “s3”, “data” you name it. Just make sure it matches your bucket name and CNAME. Hope this helps!
Thanks,
Let me know how it goes for you.

Thank you – That was so much simpler than I thought, and it works perfectly!
Just one tip: the bucket name must be universally unique (and “cdn” is already taken as a bucket name, so call your bucket something unique like “cdnxyz.domainname.com”)..